Contributing to xarray
Table of contents:
Note
Large parts of this document came from the Pandas Contributing Guide.
Where to start?
All contributions, bug reports, bug fixes, documentation improvements, enhancements, and ideas are welcome.
If you are brand new to xarray or open-source development, we recommend going through the GitHub “issues” tab to find issues that interest you. There are a number of issues listed under Documentation and good first issue where you could start out. Once you’ve found an interesting issue, you can return here to get your development environment setup.
Feel free to ask questions on the mailing list.
Bug reports and enhancement requests
Bug reports are an important part of making xarray more stable. Having a complete bug report will allow others to reproduce the bug and provide insight into fixing. See this stackoverflow article for tips on writing a good bug report.
Trying the bug-producing code out on the master branch is often a worthwhile exercise to confirm the bug still exists. It is also worth searching existing bug reports and pull requests to see if the issue has already been reported and/or fixed.
Bug reports must:
Include a short, self-contained Python snippet reproducing the problem. You can format the code nicely by using GitHub Flavored Markdown:
```python
>>> import xarray as xr
>>> df = xr.Dataset(...)
...
```
Include the full version string of xarray and its dependencies. You can use the built in function:
>>> import xarray as xr
>>> xr.show_versions()
Explain why the current behavior is wrong/not desired and what you expect instead.
The issue will then show up to the xarray community and be open to comments/ideas from others.
Working with the code
Now that you have an issue you want to fix, enhancement to add, or documentation to improve, you need to learn how to work with GitHub and the xarray code base.
Version control, Git, and GitHub
To the new user, working with Git is one of the more daunting aspects of contributing to xarray. It can very quickly become overwhelming, but sticking to the guidelines below will help keep the process straightforward and mostly trouble free. As always, if you are having difficulties please feel free to ask for help.
The code is hosted on GitHub. To contribute you will need to sign up for a free GitHub account. We use Git for version control to allow many people to work together on the project.
Some great resources for learning Git:
the GitHub help pages.
Matthew Brett’s Pydagogue.
Getting started with Git
GitHub has instructions for installing git, setting up your SSH key, and configuring git. All these steps need to be completed before you can work seamlessly between your local repository and GitHub.
Forking
You will need your own fork to work on the code. Go to the xarray project
page and hit the Fork button. You will
want to clone your fork to your machine:
git clone https://github.com/your-user-name/xarray.git
cd xarray
git remote add upstream https://github.com/pydata/xarray.git
This creates the directory xarray and connects your repository to the upstream (main project) xarray repository.
Creating a development environment
To test out code changes, you’ll need to build xarray from source, which requires a Python environment. If you’re making documentation changes, you can skip to Contributing to the documentation but you won’t be able to build the documentation locally before pushing your changes.
Creating a Python Environment
Before starting any development, you’ll need to create an isolated xarray development environment:
Make sure your conda is up to date (
conda update conda)Make sure that you have cloned the repository
cdto the xarray source directory
We’ll now kick off a two-step process:
Install the build dependencies
Build and install xarray
# Create and activate the build environment
# This is for Linux and MacOS. On Windows, use py37-windows.yml instead.
conda env create -f ci/requirements/py37.yml

conda activate xarray-tests

# or with older versions of Anaconda:
source activate xarray-tests

# Build and install xarray
pip install -e .
At this point you should be able to import xarray from your locally built version:
$ python  # start an interpreter
>>> import xarray
>>> xarray.__version__
'0.10.0+dev46.g015daca'
This will create the new environment, and not touch any of your existing environments, nor any existing Python installation.
To view your environments:
conda info -e
To return to your root environment:
conda deactivate
See the full conda docs here.
Creating a branch
You want your master branch to reflect only production-ready code, so create a feature branch for making your changes. For example:
git branch shiny-new-feature
git checkout shiny-new-feature
The above can be simplified to:
git checkout -b shiny-new-feature
This changes your working directory to the shiny-new-feature branch. Keep any
changes in this branch specific to one bug or feature so it is clear
what the branch brings to xarray. You can have many “shiny-new-features”
and switch in between them using the git checkout command.
To update this branch, you need to retrieve the changes from the master branch:
git fetch upstream
git rebase upstream/master
This will replay your commits on top of the latest xarray git master. If this
leads to merge conflicts, you must resolve these before submitting your pull
request. If you have uncommitted changes, you will need to git stash them
prior to updating. This will effectively store your changes and they can be
reapplied after updating.
Contributing to the documentation
If you’re not the developer type, contributing to the documentation is still of huge value. You don’t even have to be an expert on xarray to do so! In fact, there are sections of the docs that are worse off after being written by experts. If something in the docs doesn’t make sense to you, updating the relevant section after you figure it out is a great way to ensure it will help the next person.
Documentation:
About the xarray documentation
The documentation is written in reStructuredText, which is almost like writing in plain English, and built using Sphinx. The Sphinx Documentation has an excellent introduction to reST. Review the Sphinx docs to perform more complex changes to the documentation as well.
Some other important things to know about the docs:
The xarray documentation consists of two parts: the docstrings in the code itself and the docs in this folder
xarray/doc/.The docstrings are meant to provide a clear explanation of the usage of the individual functions, while the documentation in this folder consists of tutorial-like overviews per topic together with some other information (what’s new, installation, etc).
The docstrings follow the Numpy Docstring Standard, which is used widely in the Scientific Python community. This standard specifies the format of the different sections of the docstring. See this document for a detailed explanation, or look at some of the existing functions to extend it in a similar manner.
The tutorials make heavy use of the ipython directive sphinx extension. This directive lets you put code in the documentation which will be run during the doc build. For example:
.. ipython:: python

    x = 2
    x**3
will be rendered as:
In [1]: x = 2

In [2]: x**3
Out[2]: 8
Almost all code examples in the docs are run (and the output saved) during the doc build. This approach means that code examples will always be up to date, but it does make the doc building a bit more complex.
Our API documentation in
doc/api.rsthouses the auto-generated documentation from the docstrings. For classes, there are a few subtleties around controlling which methods and attributes have pages auto-generated.Every method should be included in a
toctreeinapi.rst, else Sphinx will emit a warning.
How to build the xarray documentation
Requirements
Make sure to follow the instructions on creating a development environment above, but
to build the docs you need to use the environment file ci/requirements/doc.yml.
# Create and activate the docs environment
conda env create -f ci/requirements/doc.yml
conda activate xarray-docs

# or with older versions of Anaconda:
source activate xarray-docs

# Build and install xarray
pip install -e .
Building the documentation
Navigate to your local xarray/doc/ directory in the console and run:
make html
Then you can find the HTML output in the folder xarray/doc/_build/html/.
The first time you build the docs, it will take quite a while because it has to run all the code examples and build all the generated docstring pages. In subsequent evocations, sphinx will try to only build the pages that have been modified.
If you want to do a full clean build, do:
make clean
make html
Contributing to the code base
Code Base:
Code standards
Writing good code is not just about what you write. It is also about how you write it. During Continuous Integration testing, several tools will be run to check your code for stylistic errors. Generating any warnings will cause the test to fail. Thus, good style is a requirement for submitting code to xarray.
In addition, because a lot of people use our library, it is important that we do not make sudden changes to the code that could have the potential to break a lot of user code as a result, that is, we need it to be as backwards compatible as possible to avoid mass breakages.
Code Formatting
xarray uses several tools to ensure a consistent code format throughout the project:
Black for standardized code formatting
Flake8 for general code quality
isort for standardized order in imports. See also flake8-isort.
mypy for static type checking on type hints
pip:
pip install black flake8 isort mypy
and then run from the root of the Xarray repository:
isort -rc .
black -t py36 .
flake8
mypy .
to auto-format your code. Additionally, many editors have plugins that will
apply black as you edit files.
Optionally, you may wish to setup pre-commit hooks
to automatically run all the above tools every time you make a git commit. This
can be done by installing pre-commit:
pip install pre-commit
and then running:
pre-commit install
from the root of the xarray repository. You can skip the pre-commit checks
with git commit --no-verify.
Backwards Compatibility
Please try to maintain backward compatibility. xarray has growing number of users with lots of existing code, so don’t break it if at all possible. If you think breakage is required, clearly state why as part of the pull request. Also, be careful when changing method signatures and add deprecation warnings where needed.
Testing With Continuous Integration
The xarray test suite runs automatically the Azure Pipelines, continuous integration service, once your pull request is submitted. However, if you wish to run the test suite on a branch prior to submitting the pull request, then Azure Pipelines needs to be configured for your GitHub repository.
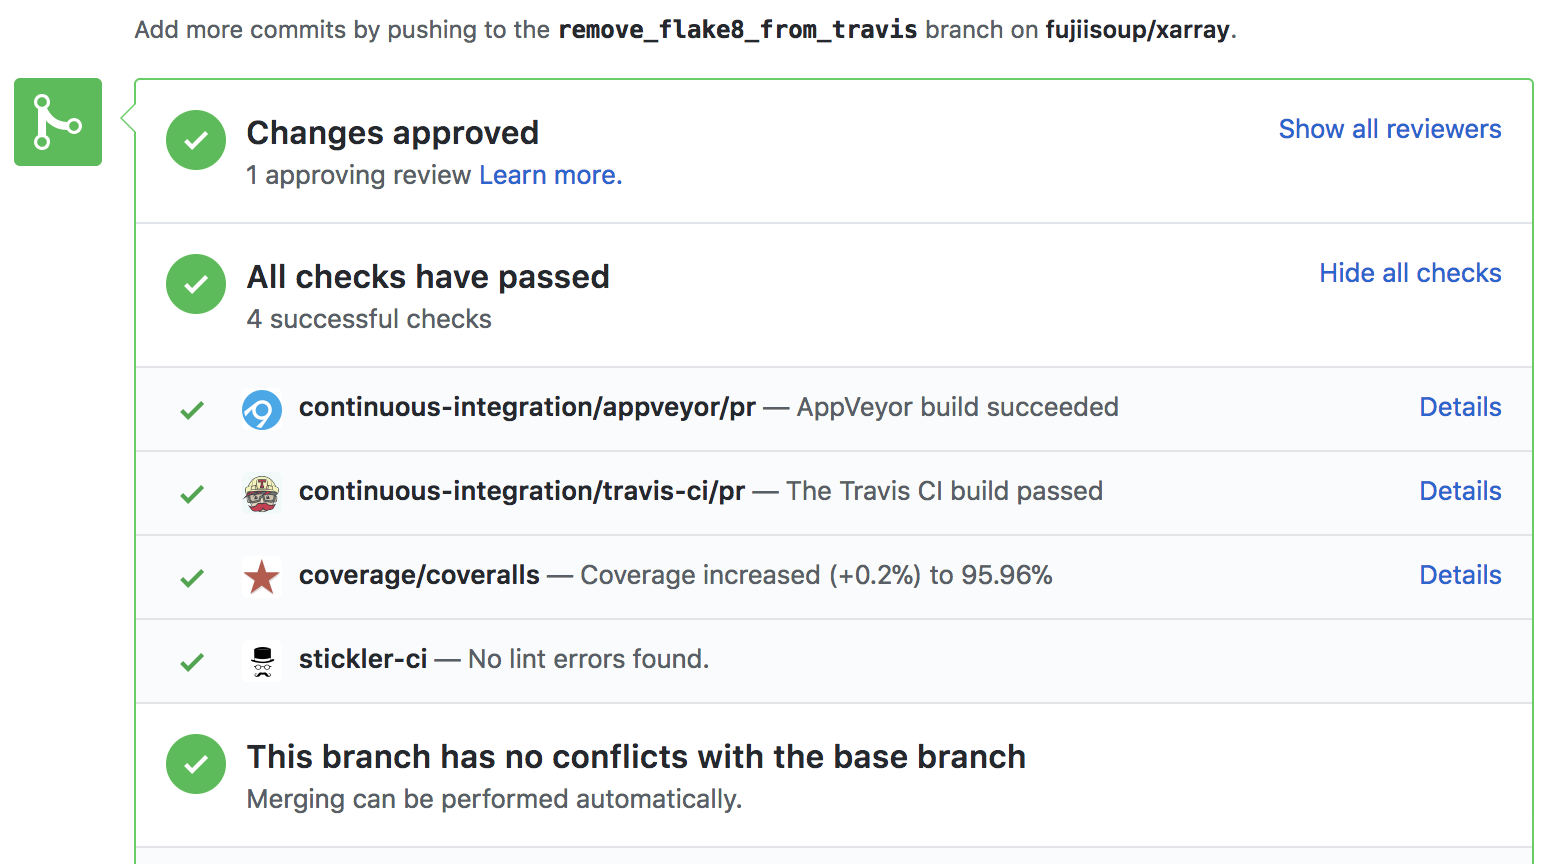
A pull-request will be considered for merging when you have an all ‘green’ build. If any tests are failing, then you will get a red ‘X’, where you can click through to see the individual failed tests. This is an example of a green build.
Note
Each time you push to your PR branch, a new run of the tests will be triggered on the CI. If they haven’t already finished, tests for any older commits on the same branch will be automatically cancelled.
Test-driven development/code writing
xarray is serious about testing and strongly encourages contributors to embrace test-driven development (TDD). This development process “relies on the repetition of a very short development cycle: first the developer writes an (initially failing) automated test case that defines a desired improvement or new function, then produces the minimum amount of code to pass that test.” So, before actually writing any code, you should write your tests. Often the test can be taken from the original GitHub issue. However, it is always worth considering additional use cases and writing corresponding tests.
Adding tests is one of the most common requests after code is pushed to xarray. Therefore, it is worth getting in the habit of writing tests ahead of time so this is never an issue.
Like many packages, xarray uses pytest and the convenient extensions in numpy.testing.
Writing tests
All tests should go into the tests subdirectory of the specific package.
This folder contains many current examples of tests, and we suggest looking to these for
inspiration. If your test requires working with files or
network connectivity, there is more information on the testing page of the wiki.
The xarray.testing module has many special assert functions that
make it easier to make statements about whether DataArray or Dataset objects are
equivalent. The easiest way to verify that your code is correct is to
explicitly construct the result you expect, then compare the actual result to
the expected correct result:
def test_constructor_from_0d():
    expected = Dataset({None: ([], 0)})[None]
    actual = DataArray(0)
    assert_identical(expected, actual)
Transitioning to pytest
xarray existing test structure is mostly classed based, meaning that you will typically find tests wrapped in a class.
class TestReallyCoolFeature:
    ....
Going forward, we are moving to a more functional style using the pytest framework, which offers a richer testing framework that will facilitate testing and developing. Thus, instead of writing test classes, we will write test functions like this:
def test_really_cool_feature():
    ....
Using pytest
Here is an example of a self-contained set of tests that illustrate multiple features that we like to use.
functional style: tests are like
test_*and only take arguments that are either fixtures or parameterspytest.markcan be used to set metadata on test functions, e.g.skiporxfail.using
parametrize: allow testing of multiple casesto set a mark on a parameter,
pytest.param(..., marks=...)syntax should be usedfixture, code for object construction, on a per-test basisusing bare
assertfor scalars and truth-testingassert_equalandassert_identicalfrom thexarray.testingmodule for xarray object comparisons.the typical pattern of constructing an
expectedand comparing versus theresult
We would name this file test_cool_feature.py and put in an appropriate place in the
xarray/tests/ structure.
import pytest
import numpy as np
import xarray as xr
from xarray.testing import assert_equal


@pytest.mark.parametrize('dtype', ['int8', 'int16', 'int32', 'int64'])
def test_dtypes(dtype):
    assert str(np.dtype(dtype)) == dtype


@pytest.mark.parametrize('dtype', ['float32',
                         pytest.param('int16', marks=pytest.mark.skip),
                         pytest.param('int32', marks=pytest.mark.xfail(
                            reason='to show how it works'))])
def test_mark(dtype):
    assert str(np.dtype(dtype)) == 'float32'


@pytest.fixture
def dataarray():
    return xr.DataArray([1, 2, 3])


@pytest.fixture(params=['int8', 'int16', 'int32', 'int64'])
def dtype(request):
    return request.param


def test_series(dataarray, dtype):
    result = dataarray.astype(dtype)
    assert result.dtype == dtype

    expected = xr.DataArray(np.array([1, 2, 3], dtype=dtype))
    assert_equal(result, expected)
A test run of this yields
((xarray) $ pytest test_cool_feature.py -v
 =============================== test session starts ================================
 platform darwin -- Python 3.6.4, pytest-3.2.1, py-1.4.34, pluggy-0.4.0 --
 cachedir: ../../.cache
 plugins: cov-2.5.1, hypothesis-3.23.0
 collected 11 items

 test_cool_feature.py::test_dtypes[int8] PASSED
 test_cool_feature.py::test_dtypes[int16] PASSED
 test_cool_feature.py::test_dtypes[int32] PASSED
 test_cool_feature.py::test_dtypes[int64] PASSED
 test_cool_feature.py::test_mark[float32] PASSED
 test_cool_feature.py::test_mark[int16] SKIPPED
 test_cool_feature.py::test_mark[int32] xfail
 test_cool_feature.py::test_series[int8] PASSED
 test_cool_feature.py::test_series[int16] PASSED
 test_cool_feature.py::test_series[int32] PASSED
 test_cool_feature.py::test_series[int64] PASSED

 ================== 9 passed, 1 skipped, 1 xfailed in 1.83 seconds ==================
Tests that we have parametrized are now accessible via the test name, for
example we could run these with -k int8 to sub-select only those tests
which match int8.
((xarray) bash-3.2$ pytest  test_cool_feature.py  -v -k int8
=========================== test session starts ===========================
platform darwin -- Python 3.6.2, pytest-3.2.1, py-1.4.31, pluggy-0.4.0
collected 11 items

test_cool_feature.py::test_dtypes[int8] PASSED
test_cool_feature.py::test_series[int8] PASSED
Running the test suite
The tests can then be run directly inside your Git clone (without having to install xarray) by typing:
pytest xarray
The tests suite is exhaustive and takes a few minutes. Often it is worth running only a subset of tests first around your changes before running the entire suite.
The easiest way to do this is with:
pytest xarray/path/to/test.py -k regex_matching_test_name
Or with one of the following constructs:
pytest xarray/tests/[test-module].py
pytest xarray/tests/[test-module].py::[TestClass]
pytest xarray/tests/[test-module].py::[TestClass]::[test_method]
Using pytest-xdist, one can speed up local testing on multicore machines. To use this feature, you will need to install pytest-xdist via:
pip install pytest-xdist
Then, run pytest with the optional -n argument:
pytest xarray -n 4
This can significantly reduce the time it takes to locally run tests before submitting a pull request.
For more, see the pytest documentation.
Running the performance test suite
Performance matters and it is worth considering whether your code has introduced
performance regressions. xarray is starting to write a suite of benchmarking tests
using asv
to enable easy monitoring of the performance of critical xarray operations.
These benchmarks are all found in the xarray/asv_bench directory. asv
supports both python2 and python3.
To use all features of asv, you will need either conda or
virtualenv. For more details please check the asv installation
webpage.
To install asv:
pip install git+https://github.com/spacetelescope/asv
If you need to run a benchmark, change your directory to asv_bench/ and run:
asv continuous -f 1.1 upstream/master HEAD
You can replace HEAD with the name of the branch you are working on,
and report benchmarks that changed by more than 10%.
The command uses conda by default for creating the benchmark
environments. If you want to use virtualenv instead, write:
asv continuous -f 1.1 -E virtualenv upstream/master HEAD
The -E virtualenv option should be added to all asv commands
that run benchmarks. The default value is defined in asv.conf.json.
Running the full benchmark suite can take up to one hour and use up a few GBs of RAM.
Usually it is sufficient to paste only a subset of the results into the pull
request to show that the committed changes do not cause unexpected performance
regressions. You can run specific benchmarks using the -b flag, which
takes a regular expression. For example, this will only run tests from a
xarray/asv_bench/benchmarks/groupby.py file:
asv continuous -f 1.1 upstream/master HEAD -b ^groupby
If you want to only run a specific group of tests from a file, you can do it
using . as a separator. For example:
asv continuous -f 1.1 upstream/master HEAD -b groupby.GroupByMethods
will only run the GroupByMethods benchmark defined in groupby.py.
You can also run the benchmark suite using the version of xarray
already installed in your current Python environment. This can be
useful if you do not have virtualenv or conda, or are using the
setup.py develop approach discussed above; for the in-place build
you need to set PYTHONPATH, e.g.
PYTHONPATH="$PWD/.." asv [remaining arguments].
You can run benchmarks using an existing Python
environment by:
asv run -e -E existing
or, to use a specific Python interpreter,:
asv run -e -E existing:python3.6
This will display stderr from the benchmarks, and use your local
python that comes from your $PATH.
Information on how to write a benchmark and how to use asv can be found in the asv documentation.
The xarray benchmarking suite is run remotely and the results are available here.
Documenting your code
Changes should be reflected in the release notes located in doc/whats-new.rst.
This file contains an ongoing change log for each release. Add an entry to this file to
document your fix, enhancement or (unavoidable) breaking change. Make sure to include the
GitHub issue number when adding your entry (using :issue:`1234`, where 1234 is the
issue/pull request number).
If your code is an enhancement, it is most likely necessary to add usage examples to the existing documentation. This can be done following the section regarding documentation above.
Contributing your changes to xarray
Committing your code
Keep style fixes to a separate commit to make your pull request more readable.
Once you’ve made changes, you can see them by typing:
git status
If you have created a new file, it is not being tracked by git. Add it by typing:
git add path/to/file-to-be-added.py
Doing ‘git status’ again should give something like:
# On branch shiny-new-feature
#
#       modified:   /relative/path/to/file-you-added.py
#
The following defines how a commit message should be structured:
A subject line with < 72 chars.
One blank line.
Optionally, a commit message body.
Please reference the relevant GitHub issues in your commit message using GH1234 or
#1234. Either style is fine, but the former is generally preferred.
Now you can commit your changes in your local repository:
git commit -m
Pushing your changes
When you want your changes to appear publicly on your GitHub page, push your forked feature branch’s commits:
git push origin shiny-new-feature
Here origin is the default name given to your remote repository on GitHub.
You can see the remote repositories:
git remote -v
If you added the upstream repository as described above you will see something like:
origin  git@github.com:yourname/xarray.git (fetch)
origin  git@github.com:yourname/xarray.git (push)
upstream        git://github.com/pydata/xarray.git (fetch)
upstream        git://github.com/pydata/xarray.git (push)
Now your code is on GitHub, but it is not yet a part of the xarray project. For that to happen, a pull request needs to be submitted on GitHub.
Review your code
When you’re ready to ask for a code review, file a pull request. Before you do, once again make sure that you have followed all the guidelines outlined in this document regarding code style, tests, performance tests, and documentation. You should also double check your branch changes against the branch it was based on:
Navigate to your repository on GitHub – https://github.com/your-user-name/xarray
Click on
BranchesClick on the
Comparebutton for your feature branchSelect the
baseandcomparebranches, if necessary. This will bemasterandshiny-new-feature, respectively.
Finally, make the pull request
If everything looks good, you are ready to make a pull request. A pull request is how code from a local repository becomes available to the GitHub community and can be looked at and eventually merged into the master version. This pull request and its associated changes will eventually be committed to the master branch and available in the next release. To submit a pull request:
Navigate to your repository on GitHub
Click on the
Pull RequestbuttonYou can then click on
CommitsandFiles Changedto make sure everything looks okay one last timeWrite a description of your changes in the
Preview DiscussiontabClick
Send Pull Request.
This request then goes to the repository maintainers, and they will review the code. If you need to make more changes, you can make them in your branch, add them to a new commit, push them to GitHub, and the pull request will be automatically updated. Pushing them to GitHub again is done by:
git push origin shiny-new-feature
This will automatically update your pull request with the latest code and restart the Continuous Integration tests.
Delete your merged branch (optional)
Once your feature branch is accepted into upstream, you’ll probably want to get rid of the branch. First, merge upstream master into your branch so git knows it is safe to delete your branch:
git fetch upstream
git checkout master
git merge upstream/master
Then you can do:
git branch -d shiny-new-feature
Make sure you use a lower-case -d, or else git won’t warn you if your feature
branch has not actually been merged.
The branch will still exist on GitHub, so to delete it there do:
git push origin --delete shiny-new-feature
PR checklist
Properly comment and document your code. See “Documenting your code”.
Test that the documentation builds correctly by typing
make htmlin thedocdirectory. This is not strictly necessary, but this may be easier than waiting for CI to catch a mistake. See “Contributing to the documentation”.Test your code.
Write new tests if needed. See “Test-driven development/code writing”.
Test the code using Pytest. Running all tests (type
pytestin the root directory) takes a while, so feel free to only run the tests you think are needed based on your PR (example:pytest xarray/tests/test_dataarray.py). CI will catch any failing tests.
Properly format your code and verify that it passes the formatting guidelines set by Black and Flake8. See “Code formatting”. You can use pre-commit to run these automatically on each commit.
Run
black .in the root directory. This may modify some files. Confirm and commit any formatting changes.Run
flake8in the root directory. If this fails, it will log an error message.
Push your code and create a PR on GitHub.
Use a helpful title for your pull request by summarizing the main contributions rather than using the latest commit message. If this addresses an issue, please reference it.